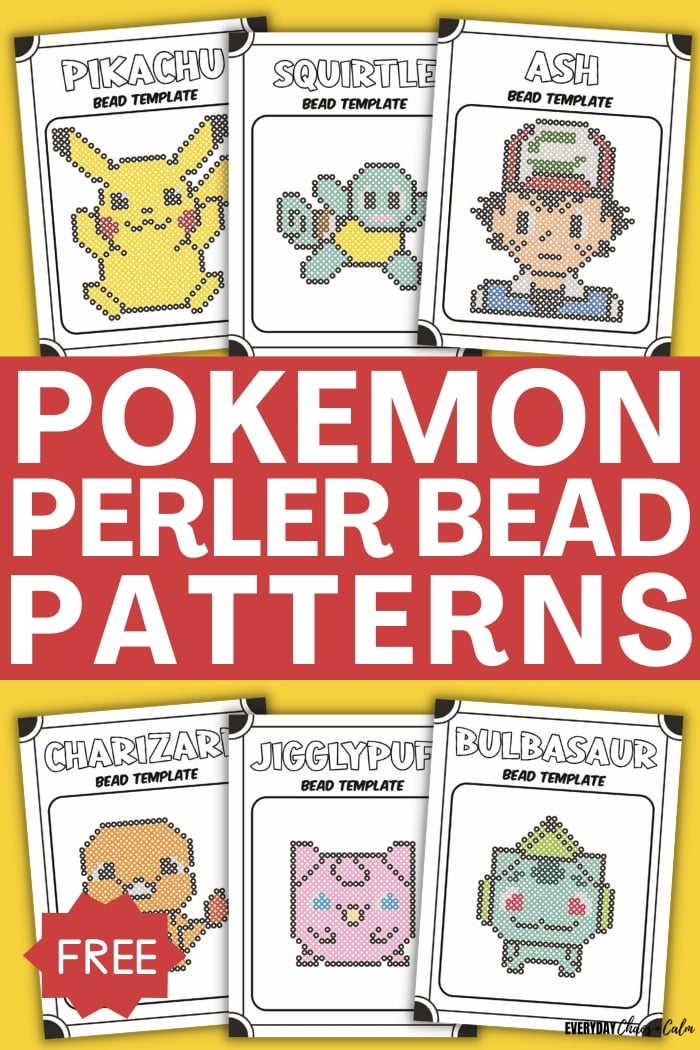
Welcome to the wonderful world of perler beads and Pokemon! Have you ever dreamed of bringing your favorite Pikachu, Eevee, or Charizard from the screen into reality as a touchable, adorable decoration? Now, through perler bead art, this dream is within reach.
Perler Beads, also known as "fuse beads," are a creative craft where you arrange colorful small beads on a pegboard into patterns, then heat-set them with an iron. It's like "pixel art" in the real world—easy to start, but with unlimited creative possibilities. In recent years, this craft that allows people to focus deeply and temporarily forget their worries has become a popular new way for many young people to relieve stress. When classic Pokemon characters meet perler beads, vivid pixel-style characters are born at your fingertips—truly a fulfilling and fun experience.
This tutorial will guide you step by step from scratch, teaching you how to turn any Pokemon image into a beautiful perler bead artwork. Ready? Let's begin this wonderful creative journey together!
Step 1: Prepare Your Trainer Equipment
A craftsman must sharpen their tools before starting work. Before beginning perler bead creation, we need to prepare a basic set of "equipment." These materials and tools can be easily purchased on major e-commerce platforms or craft stores.
Step 2: Meet Your "Pokedex Pattern Generator" — BeadPattern.net
To turn complex Pokemon images into simple perler bead patterns, we need a powerful tool. You may have heard of similar websites, but here we especially recommend BeadPattern.net.
This is a free and powerful online tool specifically designed to "pixelate" any image and generate patterns for perler beads, cross-stitch, and more. You don't need any drawing or design background—just upload an image, and it will automatically complete the most complex design work for you. Next, we'll explain in detail how to use it.
Step 3: Turn Any Pokemon Image into a Perler Bead Pattern
BeadPattern.net offers two powerful ways to easily turn your beloved Pokemon into perler bead patterns: Upload Existing Images or AI Smart Generation. Whether you want to use Pokemon images found online or have AI create a unique Pokemon design for you, BeadPattern can meet your needs.
Method 1: Upload Image Conversion (For Existing Images)
If you've already found a Pokemon image you love, this method is perfect for you.
1. Upload Image
Open the BeadPattern.net website, click the "Upload Image" button on the homepage, or drag and drop the image directly into the upload area. The website supports JPG and PNG format images.
2. Adjust Pixelation Parameters
After uploading the image, you'll see several key adjustment options:
3. Select Color System
Below the parameters, select the perler bead brand you're using. BeadPattern supports international brands (Perler, Hama, Artkal) and domestic brands (MARD, COCO, Manman, Panpan, Mixiaowo). The system will automatically map colors to the corresponding brand's color codes, making purchasing clear at a glance.
4. Remove Unwanted Colors (Optional)
If unwanted colors appear in the preview (such as background colors), simply click on that color to exclude it. This feature helps reduce the number of color codes and lower purchasing costs.
5. Manual Editing (Optional)
BeadPattern also provides brush, eraser, and fill tools for fine-tuning details. The eyedropper tool allows quick color picking for more convenient editing.
6. Export Pattern
After completing all adjustments, click the export button. You'll receive a complete perler bead pattern with color code annotations, plus a purchasing list chart showing how many beads of each color you need.
Method 2: AI Smart Generation (For Original Designs)
This is BeadPattern's secret weapon! If you want a unique Pokemon design or want AI to help create new Pokemon images, this method will surprise you.
1. Click the "AI Generate" Button
On the BeadPattern homepage, click the "AI Generate" button to enter the AI image generation panel.
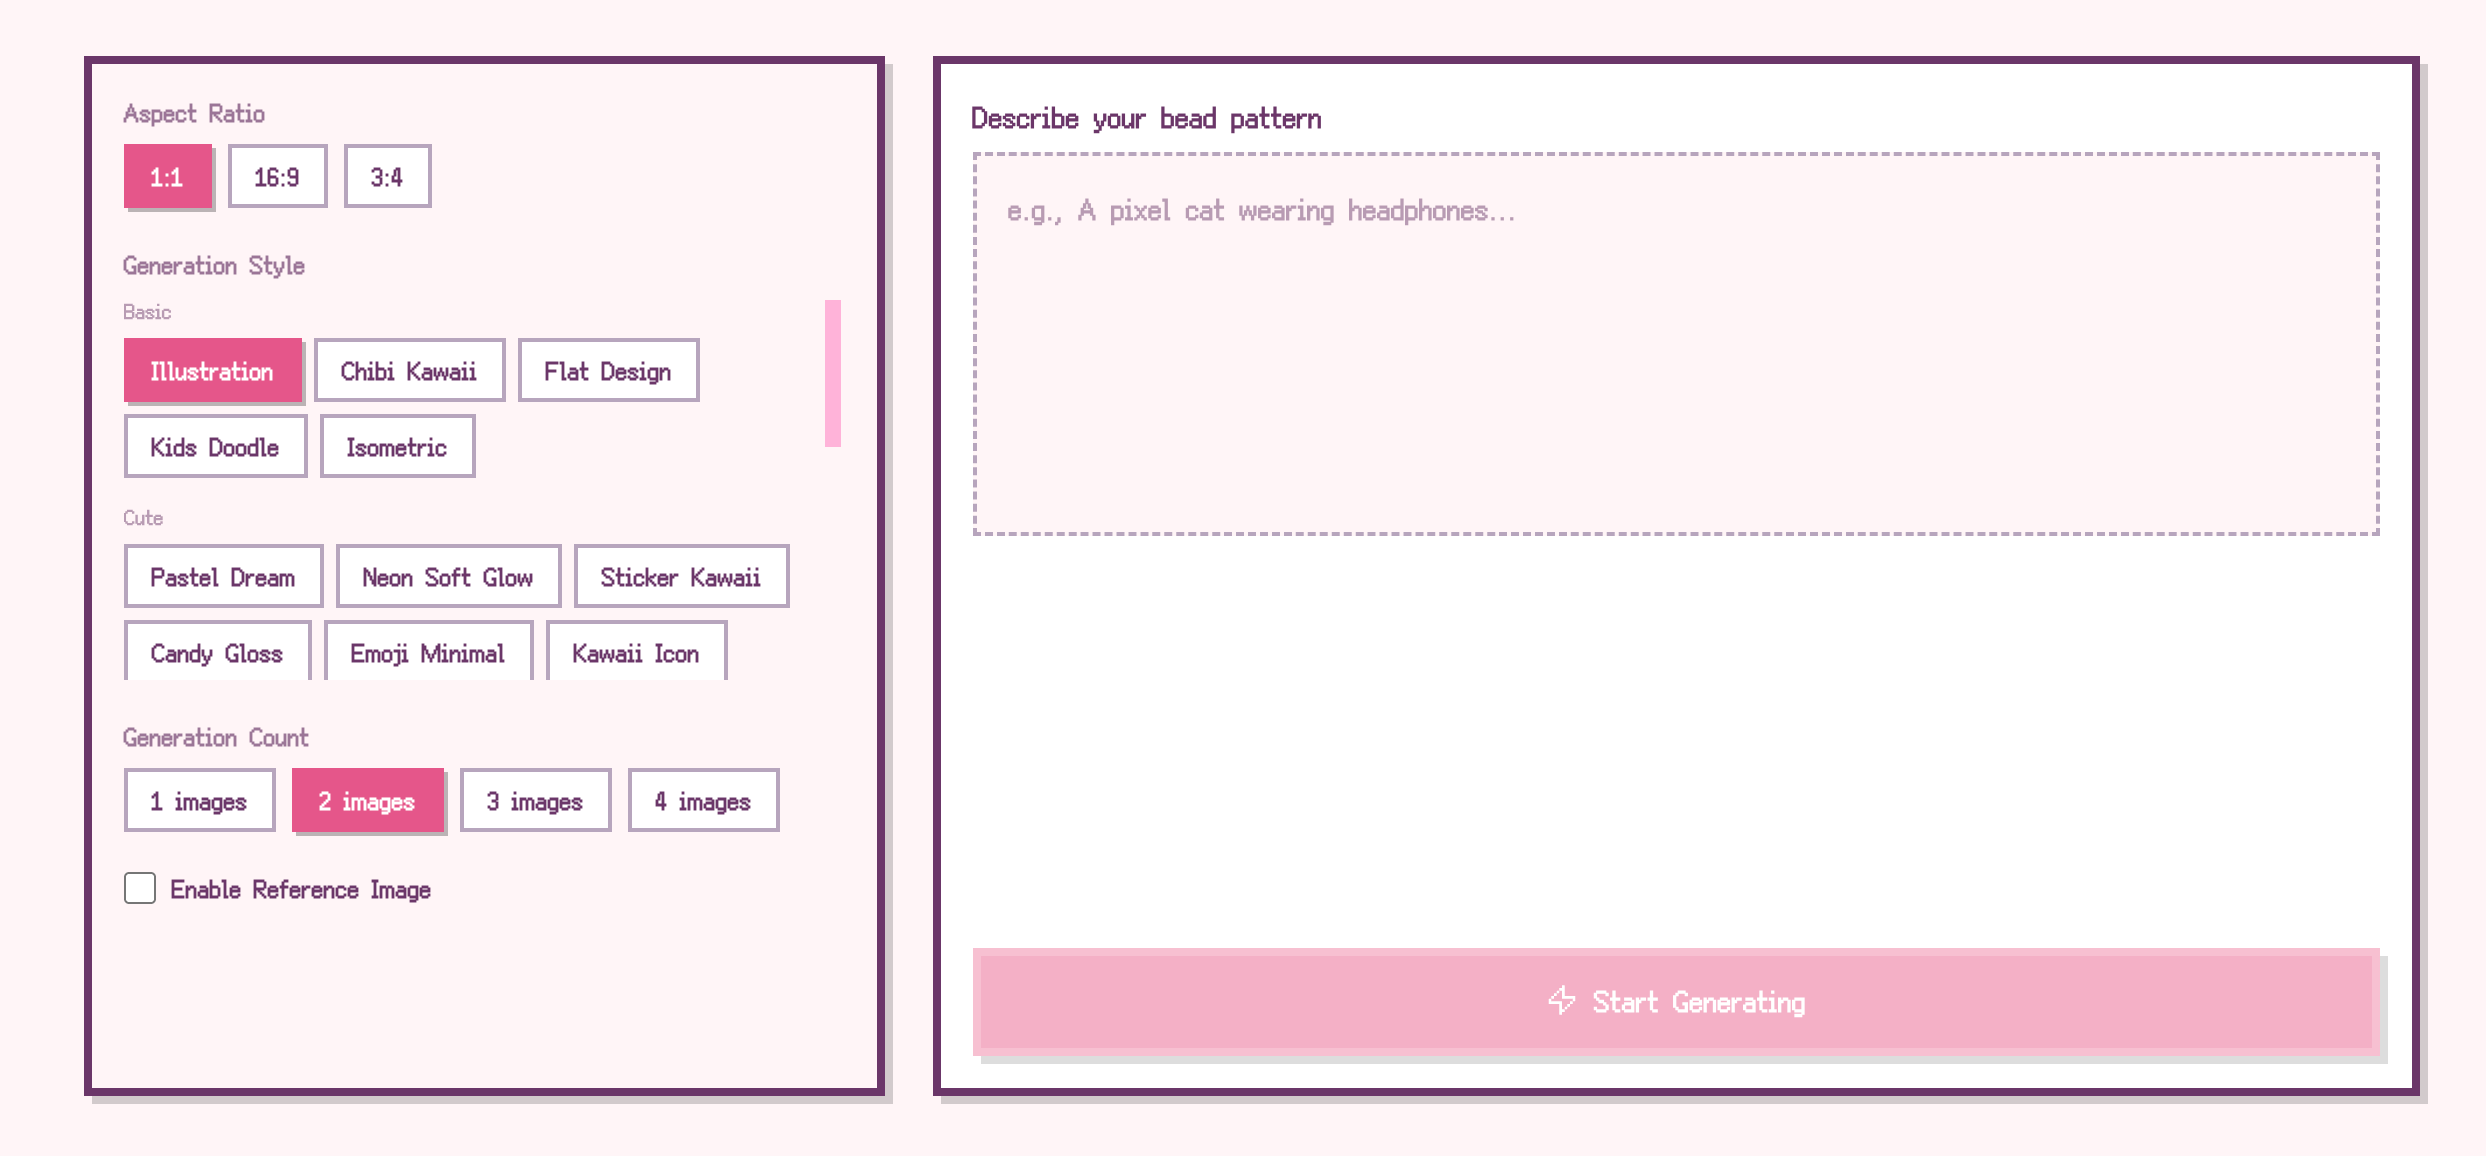
2. Enter Image Description
Describe the Pokemon pattern you want in text. You can write: "Pixel-style Pikachu with cute expression," "Chibi Eevee, sitting, simple background," "Charizard, side view, cartoon style," "Pastel dreamy style Jigglypuff."
3. Select Generation Parameters
4. Upload Reference Image (Optional)
If you have a Pokemon image you particularly like, you can enable the "Use Reference Image" switch and upload it. AI will generate new images based on the reference's style and composition, making your work closer to what you envision.
5. Select Your Favorite Image
After AI generation is complete, select your favorite one and click "Use This Image" to import it into the editor. If unsatisfied, adjust the description or parameters and click "Regenerate."
6. Follow-up Process
After importing the image, continue with Steps 2-6 from "Method 1": adjust pixelation parameters, select color system, remove unwanted colors, and export the pattern.
Using BeadPattern.net is very intuitive—in just four steps, you can get a perfect construction blueprint.
Step 4: Let's Do It! Start Pixel-Perfect Recreation of Your Pokemon
With the pattern ready, we can begin the most fun hands-on part!
1. Follow the Pattern, Place the Beads: Place the printed pattern beside you, or view it directly on your computer/tablet. Put the square pegboard on a stable surface and use tweezers to place beads one by one according to the pattern positions. This is a process requiring patience—put on some music and enjoy this focused tranquility.
2. The Key Step: Iron to Set: When all beads are placed, carefully cover the work with ironing paper smoothly. Preheat the iron to medium or "wool" setting (do not use steam function). Then, hold the iron and move it slowly and evenly in circles over the ironing paper. Through the semi-transparent paper, you'll see the beads slowly melt and fuse together. Ironing time is about 1 minute, depending on your iron temperature and work size. For a sturdier result, after slight cooling, flip the work with the pegboard, remove the pegboard, cover with ironing paper again, and iron the other side.
3. Cool and Flatten: After ironing both sides, quickly move the work (still covered with ironing paper) to a flat surface, then place prepared heavy objects (like thick books) on top. Let it sit for a few minutes until completely cool. This step effectively prevents the work from curling due to temperature changes. After cooling, remove the weights and ironing paper—your very own Pokemon perler bead artwork is complete!
Step 5: Secrets and Tips to Become a Perler Bead Master
Want to make your work even more perfect? Remember these tips from experienced crafters:
Appendix: How to Choose the Best Pokemon Images for Perler Beads?
Is any image suitable for perler beads? Not necessarily. Follow these tips for a more successful first project:
Now you've mastered all the knowledge for creating Pokemon perler beads. Don't hesitate—go choose your favorite Pokemon and turn it into a unique piece of art! Happy crafting!